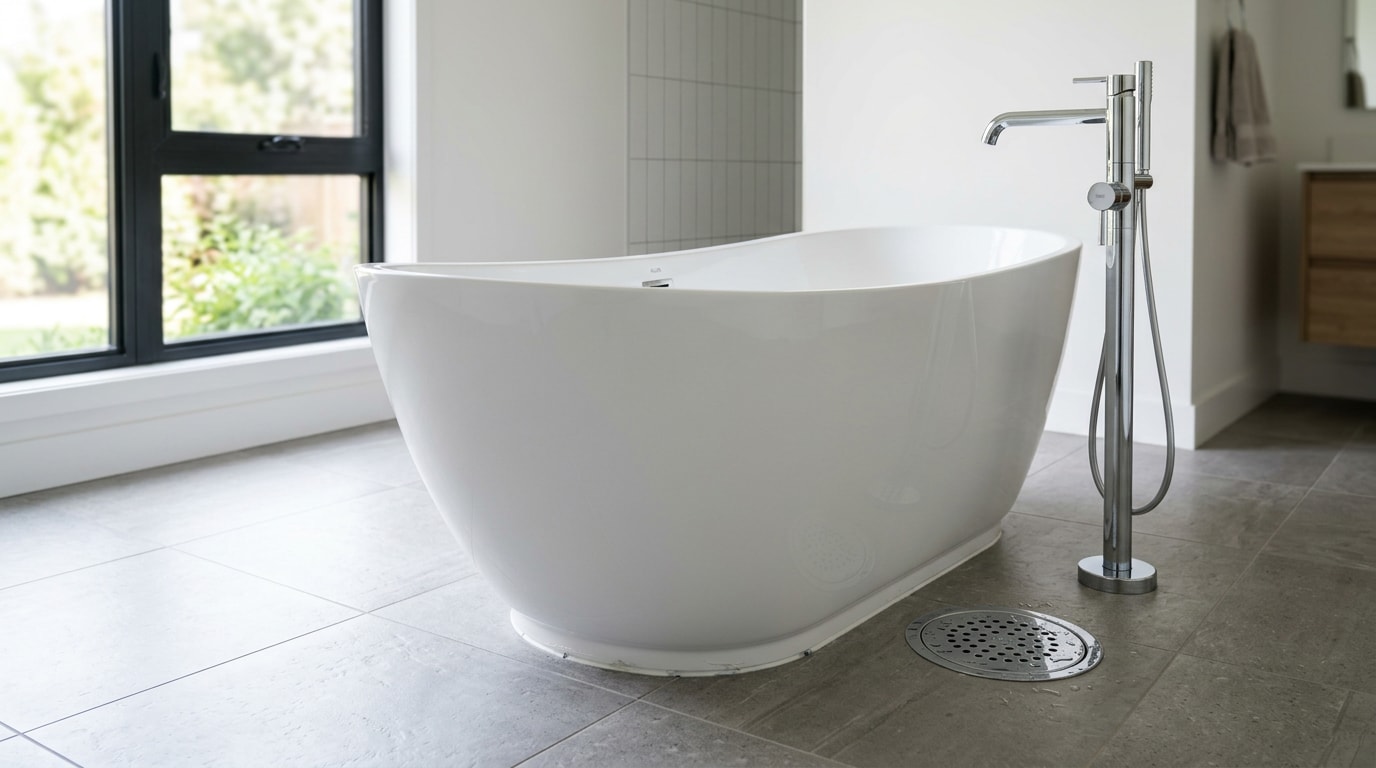
A free standing tub drain kit is the part homeowners in the Central Illinois Region, IL most often get wrong when they swap an old alcove tub for a freestanding model. The plumbing connection moves from behind a wall to the middle of the floor, so the kit, the rough-in height, and even the sealing method all change. This guide covers the components, the kit types, Illinois code specifics, and a full install sequence so the new tub doesn't leak into the subfloor on day one.
What's Inside a Free Standing Tub Drain Kit
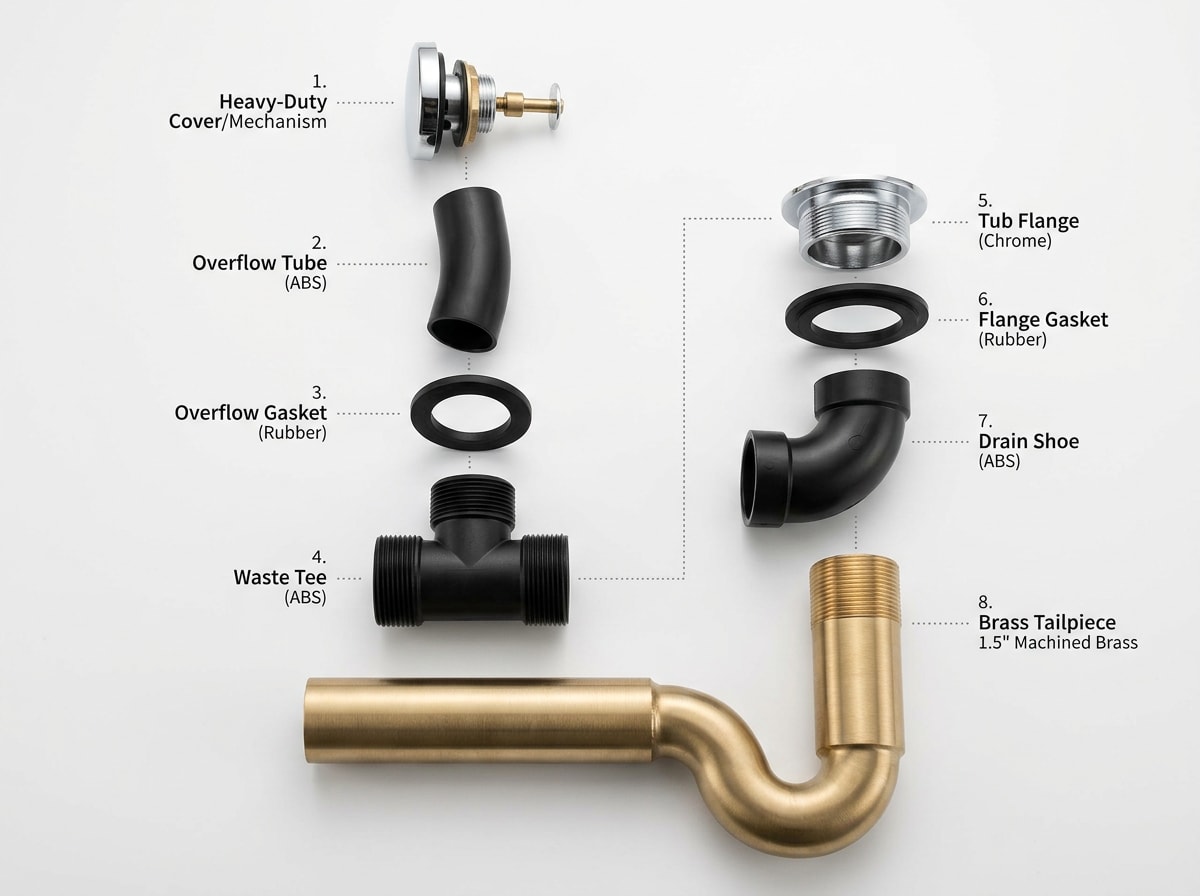
A bathtub drain kit is a small set of parts that work together to seal, drain, and safely overflow water from the tub. Most kits include an overflow assembly, a drain shoe, a flange, a stopper mechanism, and a waste tee, in either brass or plastic.
Here's how those parts break down:
| Part | Location | Function |
|---|---|---|
| Drain flange | Top of tub, inside basin | Seals the drain opening and holds the stopper |
| Drain shoe | Underside of tub | Connects the flange to the waste pipe |
| Waste and overflow assembly | Runs behind/below tub wall | Routes water to the drain line and vents excess overflow |
| Stopper mechanism | Inside drain opening | Opens and closes the drain to hold or release water |
| Waste tee | Below the tub floor | Joins drain and overflow lines into one outlet |
Brass versus plastic mostly comes down to longevity and budget. Brass resists corrosion and handles repeated wrench pressure better over decades, while PVC or ABS plastic kits cost less and work fine for lighter-use installs.
Overflow assemblies exist for a real code reason, not just convenience. Bathtubs shall be equipped with a waste outlet that is not less than 1½ inches in diameter, and the outlet must be equipped with a watertight stopper , with the overflow piping connected upstream of the trap when an overflow is installed under the current model plumbing code.
Free Standing Tub Drain Kit Types: Which Stopper Style Fits
Freestanding tub drain types fall into a few recognizable categories based on how the stopper operates.
- Toe-touch stoppers open and close with a light foot tap.
- Trip lever drains use a lever on the overflow plate to raise and lower an internal plunger.
- Lift-and-turn drains twist open by hand.
- Cable-operated pop-up drains give a cleaner look with no visible linkage.
Freestanding tubs typically pair with floor-mounted, "docking station" style kits rather than the wall-anchored drains used in alcove tubs, since there's no wall cavity to hide the connection. Checking which style your tub manufacturer specifies before buying saves a return trip to the store.
How to Choose the Right Kit for Your Tub and Floor Plumbing
Match the drain opening size, confirm whether your tub uses a center or offset drain, and verify the kit is rated for floor-mounted rough-in rather than wall-mount.
Offset drains are common on freestanding tubs because the basin shape often places the outlet closer to one end rather than dead center. Material durability matters too. A high-traffic household may justify spending more on a brass kit instead of plastic.
Rough-in height is the detail people skip. A floor-mounted drain kit built for a 12-inch rough-in won't connect to 14-inch plumbing without added fittings, so measure before you order. If you're already weighing other fixtures for the same remodel, our shower plumbing parts buying guide covers compatible hardware for the rest of the bathroom.
Illinois Plumbing Code Requirements for Tub Drains
This is the part most national buying guides skip entirely. Illinois does not adopt the International Plumbing Code or the Uniform Plumbing Code outright. The state writes and enforces its own rules through the Illinois Department of Public Health's plumbing program, under 77 Ill. Adm. Code 890. Local inspectors across Sangamon County and the wider Central Illinois Region, IL enforce that state code rather than a generic model code, so always confirm your permit and inspection requirements locally before you close up the floor.
The 1.5-inch minimum waste outlet and overflow sizing referenced earlier matches the baseline language in the 2024 International Plumbing Code's fixtures chapter, which most jurisdictions use as a technical reference point even where a state code governs enforcement. If your remodel also touches the toilet or supply lines, our toilet supply line sizing guide walks through the same kind of code-driven sizing question.
Tools and Materials You'll Need
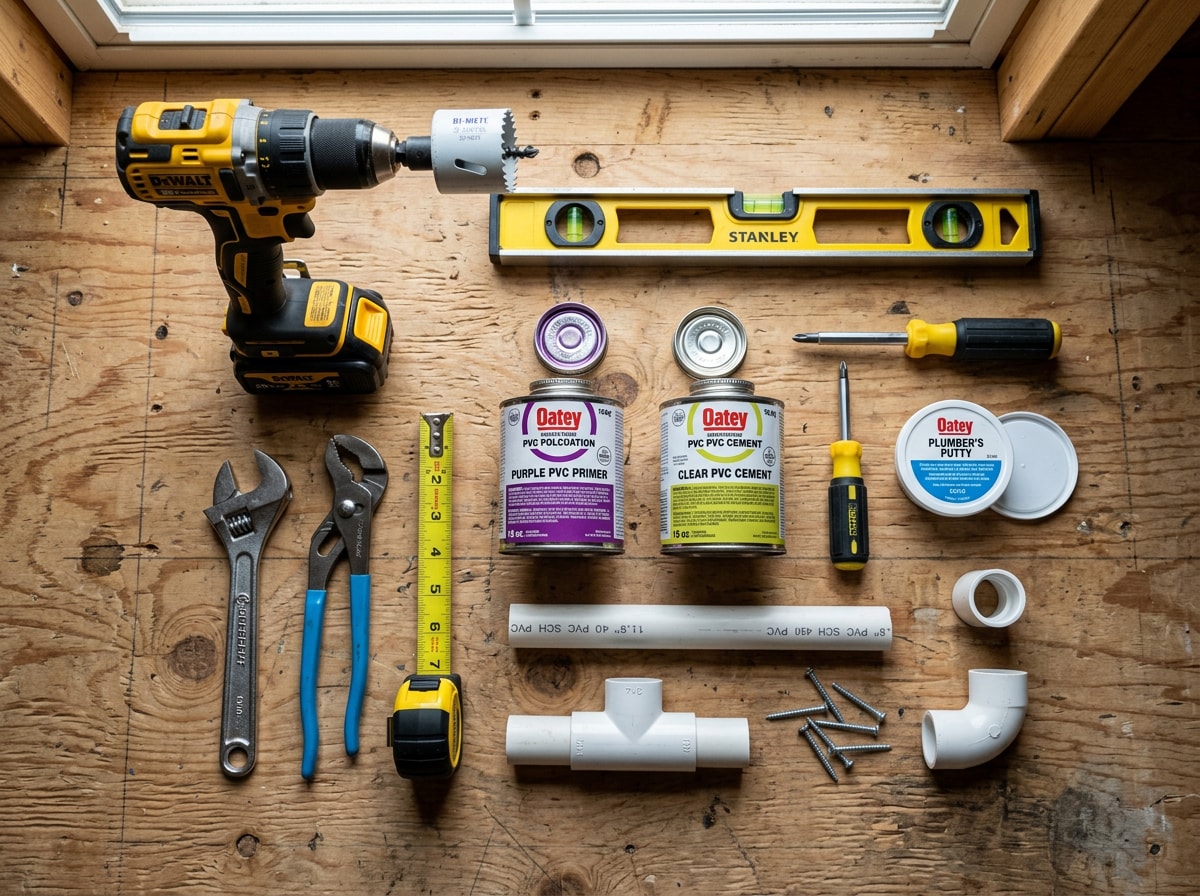
Gather everything before you start the cutout. You'll want:
- Hole saw sized to the drain cutout
- Power drill
- Level
- Tape measure
- PVC or ABS primer and cement
- Drain wrench or drain key
- Adjustable wrench and pliers
- Screwdriver
- Plumber's putty or silicone sealant
Not every kit uses the same tool on the drain body. Set-screw stoppers typically need a hex key, while crossbar-style flanges need a dedicated drain key, so check your kit's instructions before you're mid-install without the right tool.
Step-by-Step: Installing a Freestanding Tub Drain Kit
Freestanding installs differ from standard tub drains mainly in where the plumbing sits, mid-floor instead of hidden behind a wall. Follow this sequence in order.
1. Rough-In the Plumbing and Locate the Drain Line
Mark exactly where the tub's drain outlet will land on the finished floor. Because nothing hides inside a wall, measure and mark where the tub drain will align with your floor plumbing, and if you're converting from a built-in to a freestanding model, this may require rerouting your existing plumbing . Confirm the layout against the tub manufacturer's template before cutting anything.
2. Cut the Sub-Floor Opening
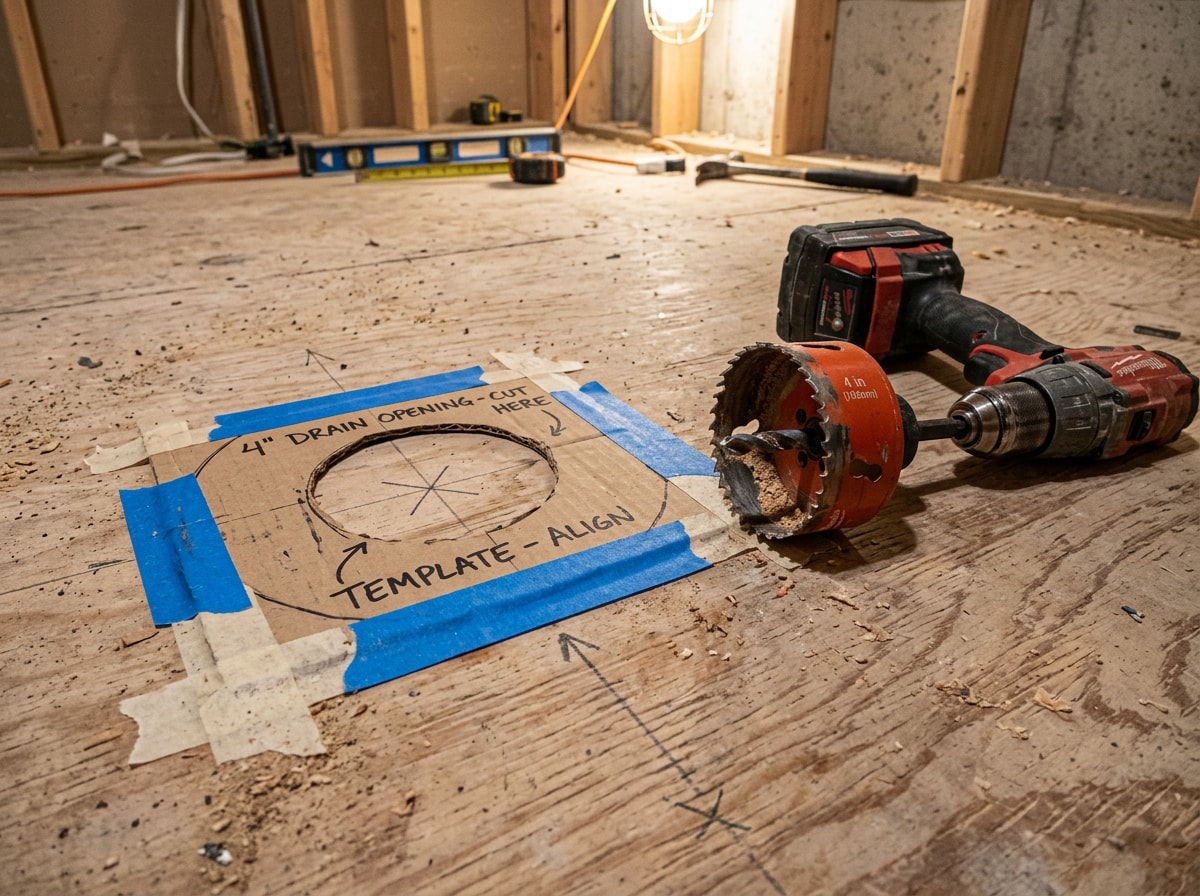
Use the kit's included cutout template to mark the hole, then cut it with a hole saw matched to the drain body's diameter. Wood sub-floors are straightforward; concrete requires masonry anchors and a rotary hammer instead.
3. Install the Drain Flange and Drain Shoe
This is where most leaks start. Set the drain body level with the sub-floor, then seal the flange from above using either plumber's putty or a rubber gasket, depending on the kit's design.
Putty-sealed flanges create a moldable seal that forgives minor surface imperfections but can dry out over years. Gasket-only designs install faster and resist deterioration, though they need a perfectly clean, flat surface to seal properly. Thread the shoe hand-tight from below, then snug it with a quarter turn of a wrench.
4. Secure the Drain Body to the P-Trap and Test for Leaks
Join the drain body to the P-trap using the correct primer and cement for your pipe material. PVC and ABS are not interchangeable. Most kits include a removable quarter-turn test plug. Confirm that the pre-installed, quarter-turn test plug is secured in the drain opening and test for leaks, then leave the test plug in place and secure the protective cap over the drain assembly until ready to set the tub .
5. Install the Overflow Gasket and Plate
Align the overflow elbow and gasket behind the tub's overflow opening, then tighten the faceplate screws evenly in a cross pattern. Over-tightening one screw before the others can twist the gasket and cause a slow leak that's hard to trace later.
6. Connect the Waste Tee and Overflow Pipes
Join the drain shoe and overflow tube into the waste tee, confirming every gasket is seated squarely before tightening. Hand-tighten first, then give each connection a final snug with a wrench. Overtightening plastic fittings can crack them.
7. Install Flooring Before Setting the Tub
Finish the floor up to the drain's protective cap, but don't remove that cap until the tub is ready to be set in place. Waterproofing methods that include applying liquid or using sheet membranes are not compatible with the freestanding tub drain , so plan your flooring approach around that limitation.
8. Position and Lower the Tub
Test-fit the tub first, checking that the drain hole lines up with the floor plumbing and the tub sits level. With a helper, lower the tub onto the drain connection, then finish securing fittings and caulking the base.
If the rough-in doesn't line up cleanly, or you're working around an older Central Illinois home with uneven joists, it's worth getting a free estimate before you commit to a cutout you can't undo.
Troubleshooting Common Issues After Installation
Slow drainage after installation usually points to a misaligned drain shoe or debris caught in the waste tee. A hidden leak often traces back to a skipped gasket or putty that wasn't pressed firmly during install.
If the stopper won't seal, check whether the linkage or set screw has loosened. This is common with trip-lever and lift-and-turn mechanisms after repeated use. Routine maintenance is simple: clean the stopper mechanism every few months and re-seat any putty seals that start to dry or crack.
Persistent leaks or drainage problems that don't clear up with basic troubleshooting are a good reason to call in a licensed plumber rather than risk water damage to the subfloor. Our crew handles exactly this kind of fixture swap across the Central Illinois Region, IL, and we've seen more than one DIY install fail from a gasket that looked seated but wasn't. Visit {{SITE_URL}}/ to see the full range of plumbing and exterior services we cover, or contact us for a free estimate before a small leak turns into a subfloor replacement.
FAQ
What is the best freestanding tub drain kit?
The best kit depends on your tub's drain placement, rough-in height, and expected wear. Brass kits generally hold up better long-term, and kits designed for offset drains suit most modern freestanding tub shapes better than center-drain designs.
What is the standard size of a bathtub drain?
Most bathtub drains use a 1.5-inch opening. The waste outlet is not less than 1½ inches in diameter under the plumbing code model most jurisdictions reference, though some older or specialty tubs use a 2-inch connection. Confirm against your specific kit and tub before purchasing.
Should there be standing water in my bathtub drain?
A small amount of standing water near the drain is normal. It's part of the trap seal that blocks sewer gas from entering your home. If water pools and drains unusually slowly, that points to a clog or misalignment worth troubleshooting.
Is a bathtub drain 1.5 or 2 inch?
Most bathtub drain openings measure 1.5 inches, but the branch and waste lines downstream can run 1.5 to 2 inches depending on local plumbing code. Don't confuse the fixture's drain size with the pipe size feeding into your home's waste system.
Do I need a permit to install a freestanding tub drain in Illinois?
Most municipalities in the Central Illinois Region, IL require a plumbing permit for drain relocation or new rough-in work, since it changes the waste and vent system. Check with your local building department or IDPH's plumbing program before cutting into the subfloor, and consider a licensed plumber if the job involves rerouting existing lines.